Introduction
Purpose
The aim of this project is to use PMS7003 sensor to measure air quality and transmit data to ThingSpeak IoT cloud platform via WiFi.
This project is based on our previous project named "ESP8266-based air quality monitoring system using PMS7003 sensor". It adds WiFi functionality to send measured data to the IoT cloud. Especially, ThingSpeak offers a free account, which is good enough for prototyping IoT device easily.
Features
This project is based on our previous project named "ESP8266-based air quality monitoring system using PMS7003 sensor". It adds WiFi functionality to send measured data to the IoT cloud. Especially, ThingSpeak offers a free account, which is good enough for prototyping IoT device easily.
Prerequisites
- ESP8266 package for Arduino IDE
- ThingSpeak free account
Hardware
-Wemos D1 mini : US$1.77 on Aliexpress
-PMS7003 air quality sensor : US$16.80 on Aliexpress
Step 1. Setup hardware
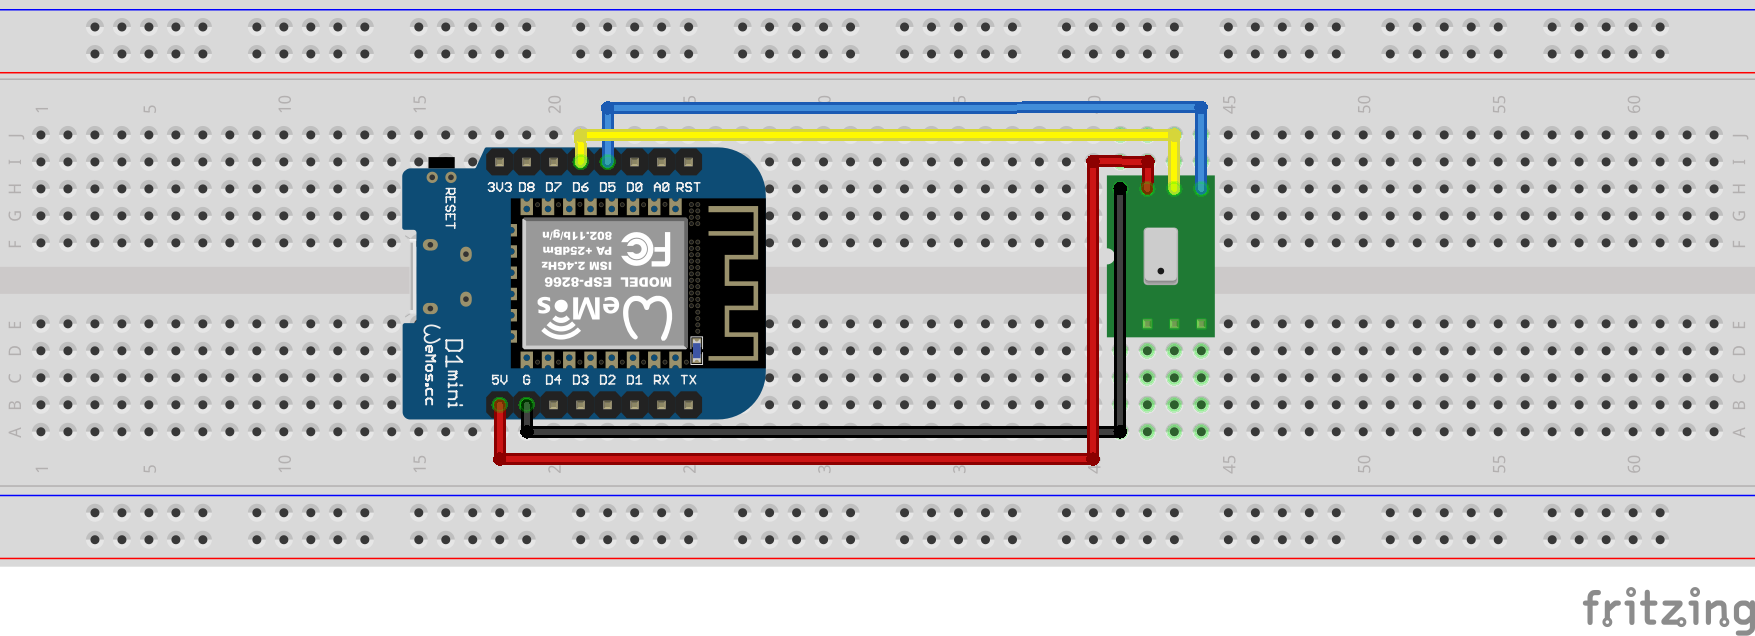
PMS7003 sensor comes with a small breakout board, which has TX, RX, VCC, GND pins. Connect TX of PMS7003 to D5 of Wemos, RX to D6, VCC to 5V, and GND to G. Finally, connect micro usb to Wemos for uploading firmware, and check serial monitor and serial plotter in Android IDE to make sure the sensor works correctly.
Step 2. Create ThingSpeak free account and channel
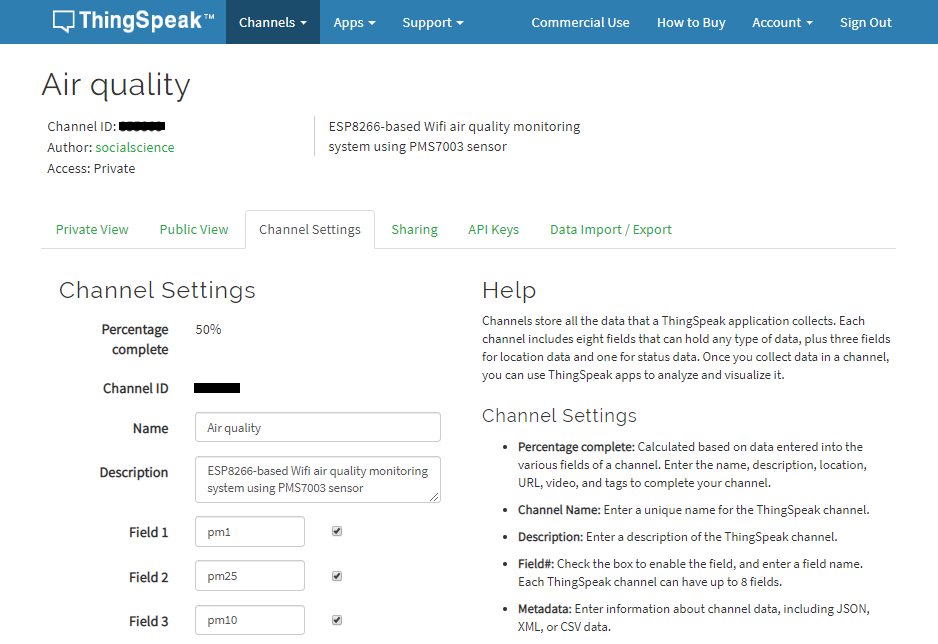
In this project, we will create a channel with 3 fields. Each field stores value for PM1.0, PM2.5, and PM10.0, respectively.
Step 3. Upload sketch to Wemos D1 mini
In the following sketch, three values need to be modified with your own.
- WIFI_SSID : Name of WiFi router
- WIFI_PASS : Password of WiFi router
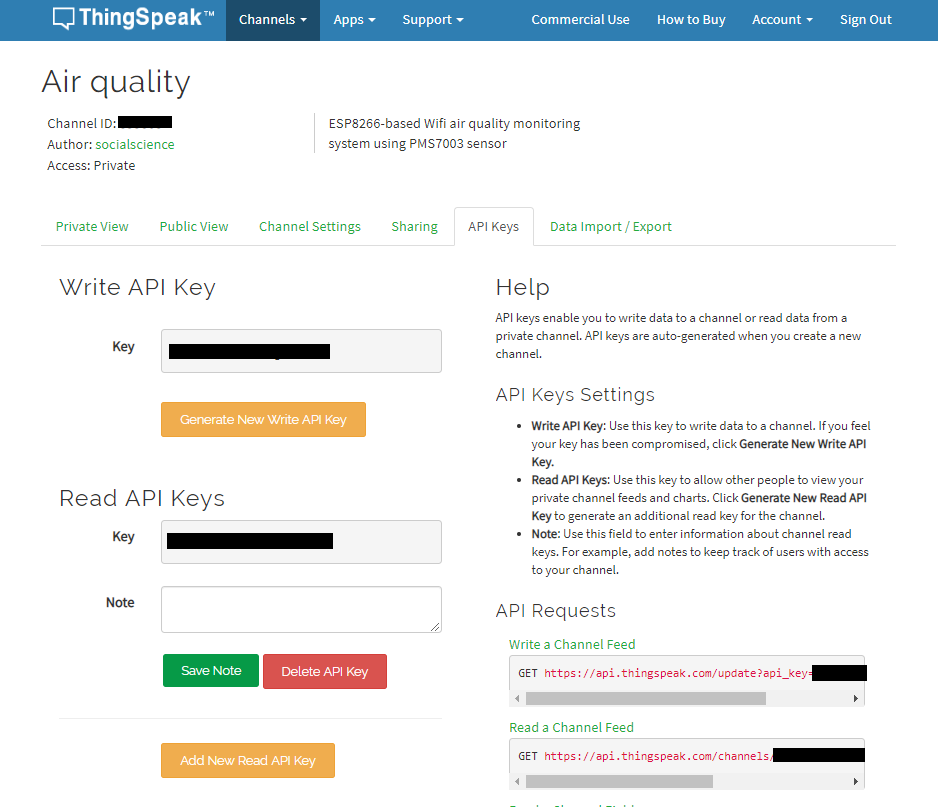
- TS_KEY : Value of 'Write API Key' of the channel
For WiFi feature, two functions are added to the sketch of our previous project.
- connectWifi() : Connect to WiFi router
- uploadCloud() : Upload measured data to ThingSpeak cloud using HTTP GET request
After uploading firmware, Wemos restarts itself automatically. Once Wemos D1 mini has restarted, serial monitor shows air quality data from PMS7003 every 5 minutes. In the following serial console output, it shows a HTTP GET request and response from ThingSpeak.
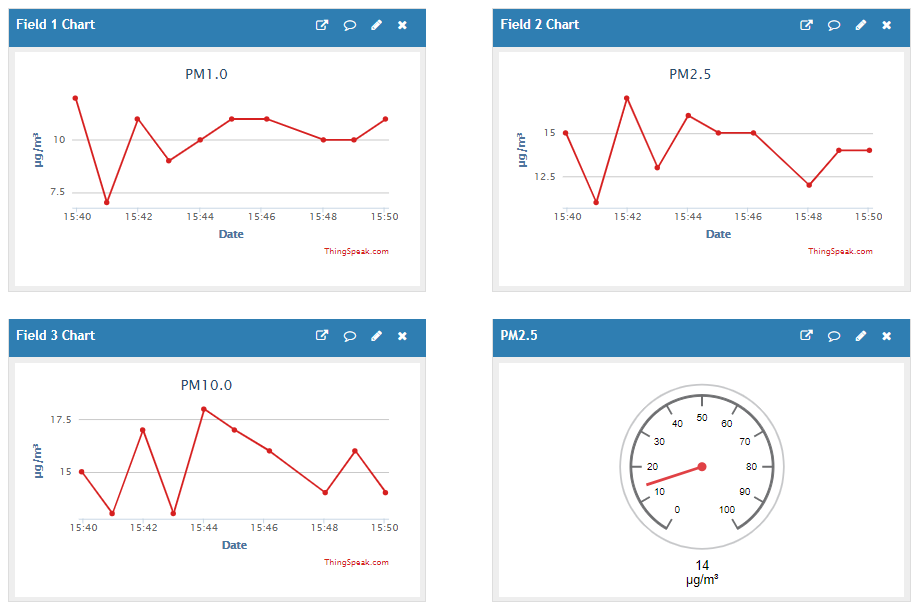
On ThingSpeak website, we can check the data which is sent from device. In the menu, go 'Channels/My channels', then, click 'Private' submenu of the channel. By default, it will show you line graph of each individual field. By clicking 'Add Widgets' menu, you can create a gauge widget as well. For example, in the following screenshot, the bottom right gauge is added manually to make it easier to read for users.
Source codes at github
- ThingSpeak free account
Requirements
-Wemos D1 mini : US$1.77 on Aliexpress
-PMS7003 air quality sensor : US$16.80 on Aliexpress
Instructions
PMS7003 sensor comes with a small breakout board, which has TX, RX, VCC, GND pins. Connect TX of PMS7003 to D5 of Wemos, RX to D6, VCC to 5V, and GND to G. Finally, connect micro usb to Wemos for uploading firmware, and check serial monitor and serial plotter in Android IDE to make sure the sensor works correctly.
Step 2. Create ThingSpeak free account and channel
In this project, we will create a channel with 3 fields. Each field stores value for PM1.0, PM2.5, and PM10.0, respectively.
After creating a channel, click 'API Keys' menu to find out 'Write API Key' value, which we will use in our sketch.
Step 3. Upload sketch to Wemos D1 mini
In the following sketch, three values need to be modified with your own.
- WIFI_SSID : Name of WiFi router
- WIFI_PASS : Password of WiFi router
- TS_KEY : Value of 'Write API Key' of the channel
For WiFi feature, two functions are added to the sketch of our previous project.
- connectWifi() : Connect to WiFi router
- uploadCloud() : Upload measured data to ThingSpeak cloud using HTTP GET request
Results
On ThingSpeak website, we can check the data which is sent from device. In the menu, go 'Channels/My channels', then, click 'Private' submenu of the channel. By default, it will show you line graph of each individual field. By clicking 'Add Widgets' menu, you can create a gauge widget as well. For example, in the following screenshot, the bottom right gauge is added manually to make it easier to read for users.
References
- IoT Laboratory: ESP8266-based air quality monitoring system using PMS7003 sensor
- IoT Laboratory: ESP8266-based WiFi MQTT air quality monitoring system using PMS7003 sensor
- IoT Laboratory: ESP8266-based WiFi MQTT air quality monitoring system using PMS7003 sensor
- PMS7003 sensor : http://www.plantower.com/en/content/?110.html


No comments:
Post a Comment